
- Home
- Leisure & Lifestyle
- Learning
- An introduction to macramé
How does Rest Less make money
We make money through advertising and commission from affiliate links, which enable us to offer Rest Less as a free service to our users. The content on this page may use affiliate links, which track traffic from our website to a third party provider and enable us to receive a commission or payment from any traffic we refer.
* Affiliate links on this page have an * next to them. We place enormous importance on our editorial independence and the integrity of our content which means that we will never change how we write about something as a result of an affiliate link.
Do you love the bohemian style of the 70s? Have you always wanted to create things like jewellery, bags, and clothes by hand? If so, then you might be interested in macramé.
Macramé is a form of fibre art that involves tying knots in ‘macramé cord’ to create a wide range of decorative and functional items.
It has ancient roots that can be traced all the way back to 13th-century Arabic weavers who used it to fashion decorative fringes on towels, shawls, and rugs. Some people even argue that the origins of macramé stretch even further back than that; as early as 3rd century China.
It wasn’t until the 14th, 15th, and 16th centuries that macramé spread across Europe, and by the 1600s, it eventually reached the UK where it became so popular that even Queen Mary II taught it to her ladies-in-waiting.
Since then, macramé has fallen in and out of fashion in the UK. It was particularly popular in the Victorian era; being used by homemakers to create things like tablecloths and bed linens, and then again in the 70s, where it became an iconic part of hippie culture. And in recent years, we’ve seen yet another upsurge in macramé’s popularity.
So, if you’ve never tried your hand at macramé before, but you fancy giving it a go, here’s everything you need to know to get started.
1. Learn the basic macramé knots

Although you can embellish your macramé designs with things like glass beads and decorative fringing, the art itself is essentially tying knots. And one of the best things about macramé is that you only need to know a handful of knots to create anything from the simplest design to large, sprawling, and intricate masterpieces.
So before you go and invest in some nice materials (which we’ll cover below), it’s worth grabbing yourself some basic 3-5mm single strand cotton macramé cord, and practising some knots. This is a great macramé cord for beginners as it’s easy to knot, but also easy to undo if you go wrong.
When tying macramé, you’ll need to anchor your project so you can get some resistance and stop your cords from moving around and tangling up as you work. But how you anchor your macramé will depend completely on your project and how you’d like to work.
For instance, if you’re making a wall hanging, you can hang a wooden dowel from the wall in the spot you’d like it to hang once it’s finished and work there, like in this video.
Many macramé enthusiasts also hang projects from clothing rails with S hooks. Or for smaller projects, you could use a macramé board. If you’d like to make your own macramé board at home, then why not check out this how-to from Felt Magnet?
It’s worth remembering that there’s no right or wrong way to anchor your macramé project, so get creative with it! If you just want to learn some knots, you can even sellotape your macramé cords to a wall or a sturdy piece of furniture.
Once you’ve worked out how you’re going to anchor your cords, it’s time to start learning some basic knots:
Lark’s head knot
One of the first knots you’ll tie on any macramé project is the lark’s head knot. This is the knot that’ll fasten your cord to an object, for instance, a dowel, ring, or even another cord. Although, you won’t be able to practise this knot if you’re using the sellotape method mentioned above.
You can also tie this knot the other way around so the ‘bump’ is hidden, which is referred to as a ‘reverse lark’s head knot’.
Have a watch of the video below to see what a lark’s head knot looks like.
Wrapping knot (or gathering knot)
A wrapping knot is used to bunch a load of cords together, either at the beginning of your projects, at the end, or when making things like tassels.
Check out the video below to find out how to tie a wrapping knot.
Square knot
Once you’ve attached two cords to your dowel, ring, or whatever base you’re using, you can now practise the square knot. The square knot is one of the most common macramé knots and it’s used to create decorative patterns.
The square knot can be tied as either left facing or right facing, depending on which side you start on. You can tell whether it’s left or right facing depending on which side the ‘bump’ is on.
Check out the video below to find out how to tie a left-facing square knot. For a right-facing one, just repeat the process the other way around.
Alternating square knot
To tie alternating square knots, you don’t need to learn an entirely new knot. You just alternate the cords you’re using to tie your square knots across each row. This will leave you with a net or mesh-like pattern that’s common in lots of macramé projects.
Check out the video below to learn how to tie alternating square knots.
Half hitch (or double half hitch knot)
The half hitch knot (or the double half hitch knot when repeated twice) is another very common knot in macramé projects and it’s used to create horizontal and diagonal patterns.
The video below will show you how to tie a double hitch knot, as well as how to implement it – so you can create horizontal and diagonal lines in your work.
Spiral knot (or half knot)
The spiral knot is essentially half a square knot. And when tied in succession, a beautiful spiral pattern forms. Just make sure that if you start with a left-facing spiral knot, you continue to tie them this way. If you change direction, your spiral will start to turn the other way around, and won’t look quite right.
Check out the video below to find out how to tie a left-facing spiral.
Learning these six basic knots will give you a great foundation to start embarking on some macramé projects. Though, from berry knots to barrel knots, there are plenty of other knots you can learn. So if your project demands it, you can just search for the knot you need on YouTube, and you’ll find plenty of tutorials to help you along.
2. Explore other learning resources you can use to get started with macramé

As we’ve already mentioned, one of the best things about macramé is how accessible it is to learn. So once you’ve picked up the basic knots, you can get on with choosing what you want to make. However, if you want to learn more about the art of macramé before you get going, or you’re keen to learn along the way, then there are plenty of resources available.
Mastering the Art of macramé is a step-by-step video course that’ll take you on a journey through the world of macramé. Although not a free course, whether you’re a brand-new knotter or a macramé veteran, it’ll provide you with everything you need to know in creating beautiful projects and making your very own designs.
You can also search for macramé courses near you if you’re interested in learning the craft in person. If you can’t find any classes you like the look of, then it’s always worth enquiring at your local arts and crafts shop, as they sometimes run classes themselves or will be able to recommend one.
If you learn well by reading, then there are always plenty of great macramé books out there, like Amada Jones’ Macramé for Absolute Beginners and Emily Katz’s Modern Macramé.
And finally, one of the best and most comprehensive resources out there for learning macramé is probably the internet. You can search for project-specific tutorials on sites like The Spruce Crafts, which means all you have to do is follow along. You can also search for specific skill tutorials on techniques like fringing.
3. Choose your macramé project

The next step in your macramé journey is to choose your project. And while the list of things you can make with macramé is endless, we thought we’d go over a few of the most popular projects for beginners.
Plant hangers
Plant hangers are an interesting and trendy way to display your greenery both inside and out. So why not take a look at the video below to find out how to make one in 30 minutes?
Friendship bracelets
A staple in the world of macramé – and you might even have made one when you were a kid – friendship bracelets make great accessories for yourself, or you can gift them to a friend. You can even think about jazzing them up with some beads.
Check out the video below to find out how to make a beautiful minimalist friendship bracelet.
Coasters
Coasters are another fun and not-too-large project for macramé newbies to start honing their knotting skills. Why not take a look at the tutorial below from Macramé UK to get started?
Tote bags
We all know that plastic shopping bags are terrible for the environment and that using reusable ones is a great alternative. But why not go that one step further and make your very own macramé tote bag? This tutorial from Love Crafts will show you how.
Christmas decorations
In the lead up to Christmas, you can also use macramé to make beautiful bauble decorations, which will look good on your tree or make great holiday gifts. Check out the video below to find out how to make them.
Wall hangings
One of the most popular choices among the macramé community, wall hangings were all the rage back in the 70s, and are now, like macramé itself, making a big comeback. So if you want to give your home some bohemian style, you might want to take a look at the video below.
These are just a few of the projects you can tackle and by no means is this an exhaustive list. For even more inspiration, why not check out these ideas from Morning Chores? Pinterest is also a really great place to find some fun and creative project ideas.
4. Get your macramé materials together
Once you’ve learned the basic knots, and you’ve chosen your project, you can start thinking about supplies and materials – the main one being your macramé cord.
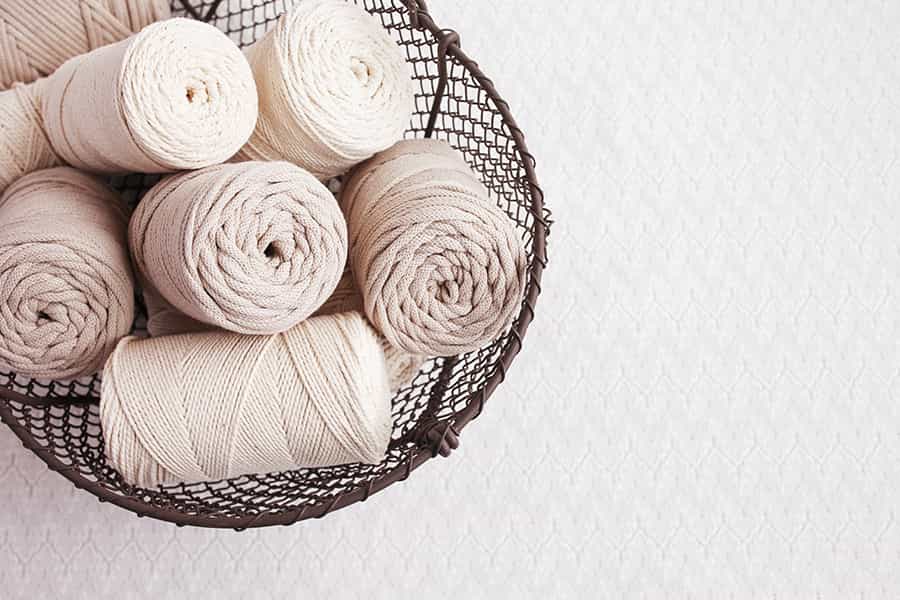
Cord
When you’re new to the craft, it can be difficult to get your head around all the different names for macramé cord. Some people call it rope or twine, while others call it yarn or string. What’s even more confusing is that there’s a whole host of different types, colours, and sizes of cord to choose from, so selecting the right one for your project can be a little tricky.
Below, we talk about the main types of cord and give some pointers on choosing the right thickness.
Types of cord
There are three main types of macramé cord:
Single-strand cord – (or single twist cord) is made up of lots of fibres that are twisted together into a single strand. Probably the most popular cord among macramé enthusiasts, single-strand cord is soft, malleable, and great for creating fringes. However, it also frays easily, and knots and patterns created with it appear flatter than with other types of cord.
Three-ply cord – (or three-strand cord) is made up of three single strands of cord wound around one another. This type of cord is more robust than single-strand cord and will give your creations a much chunkier texture. You can also make fringes with three-ply cord, but you’ll have to first untwist the three separate strands.
Braided cord – is made up of lots of little strands of fibre that have been braided into a tight cord. It’s relatively cheap, strong, and easy to tie, which makes it quite attractive to beginners. However, it’s also quite difficult to un-tie, which can prove problematic for people who are just learning their knots. Braided cord is also not very malleable and you can’t make fringes with it.
When choosing what type of cord to use for any given project, it’s entirely down to personal preference. To help you along, you can consider questions like ‘What kind of aesthetic do I want my piece to have?’ and ‘Is it decorative or functional?’
If you’re making a bag that needs to be strong and durable, then consider a stronger cord, such as three-ply or braided. Or, if you’re making a wall hanging or a piece of jewellery, then you might want it to be soft and delicate. In this case, it might be best to use single-strand cord.
Other things to consider when choosing your cord
Other things you’ll need to think about when purchasing cord for your macramé projects include what the cord is made of and the size. Cord is made from a variety of different fibres, though, you can generally classify them into two different categories: synthetic and natural.
Natural fibres – such as cotton, wool, and hemp, are usually softer than synthetic fibres and much more popular among macramé enthusiasts. And if you’re looking to keep your hobby sustainable, natural fibres are the obvious choice as they’re biodegradable. To find out more about natural fibres, why not take a look at this comprehensive article from Free Macramé Patterns?
Synthetic fibres – such as polypropylene, nylon, and acrylic typically aren’t as soft as natural fibres, and they’re often made from plastic and animal products, so they aren’t usually eco-friendly. However, you can find synthetic cord that has been made from 100% recycled material. Synthetic fibres are also typically more durable than natural fibres, so for any projects that might have to spend some time outside – a tote bag or an outdoor plant hanger, for example – synthetic fibres are worth keeping in mind.
And finally, when choosing the thickness of your cord, there’s also no right answer – it’s mainly down to the size of your project. The general rule is the larger your project is, the thicker the cord. This doesn’t mean that you can’t complete larger projects with thinner cord (you might want to if you’re making a particularly intricate pattern), but bear in mind that the thinner your cord, the longer it’ll take you to complete your creation.
As for size, macramé cord is usually measured in millimetres, with small cord being between 1mm and 2mm, medium being between 3mm and 5mm, and anything over 6mm is thought to be large. You can expect most of your macramé projects to use medium-sized cord, and something around the 4mm and 5mm mark is usually recommended for beginners.
For more information on macramé cord sizing, why next check out this excellent blog post from Bochiknot?
Other bits you’ll need
While at its most basic level, macramé is just knotting cords, to get crafting your beautiful macramé creations, you might want to invest in a couple of tools and other materials.
For example:
Sharp scissors – probably the most important tool you’ll need, it’s worth making sure your scissors are purpose-made for cutting fibres and textiles.
Tape measure – to measure out your cords.
A macramé board (optional) – if you don’t want to make your own, then you can buy purpose-made macramé boards, such as this one from BeadSmith.
Pins (optional) – useful if you need to anchor your cord to a macramé board.
A wooden dowel or a ring (optional) – many projects, such as wall hangings and plant hangers, use either a wooden dowel or a ring as a starting point.
Beads (optional) – you can use wooden, plastic, or glass beads to embellish your projects.
Final thoughts…
And that’s it! Once you’ve learned the basics, chosen your project, and gathered all of your materials and equipment, you’re ready to get crafting! We hope that you’ve enjoyed this introductory guide to macramé and found it helpful.
If macramé isn’t for you, but you’d like to get involved with some other creative hobbies, then why not check out the learning section of our site? Here, you’ll find introductory guides on anything from knitting and drawing, to calligraphy and carpentry.
Are you a macramé enthusiast? What projects have you completed? Or perhaps you’re looking to get into macramé? We’d love to hear from you in the comments below.
Sam McLoughlin is a Senior Lifestyle Writer at Rest Less. He joined the editorial team in 2021 after completing his Master’s degree in English Literature, Culture, and Theory at The University of Sussex. He enjoys writing about careers, books, sports, travel, and pretty much anything that his editor will let him have a crack at, but his favourite part of the job is interviewing inspiring people – from activists and CEOs to later life career changers. In his spare time, Sam enjoys climbing, snowsports, and going to see live music.
* Links with an * by them are affiliate links which help Rest Less stay free to use as they can result in a payment or benefit to us. You can read more on how we make money here.
Join the discussion
Read our full commenting terms and guidelines